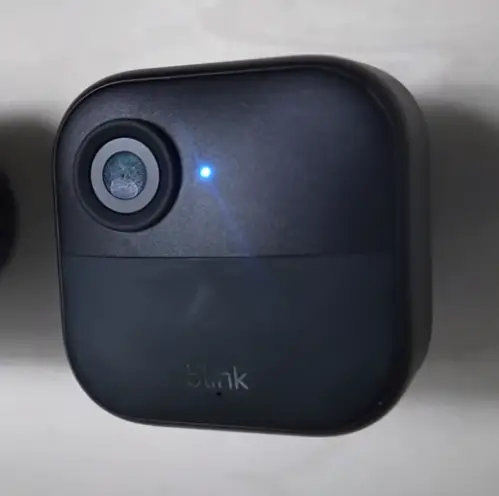
Security cameras like Blink Camera are there in place to help you ascertain your safety. But what happens when it stops detecting motion? Well, what happens when the security camera stops doing what it’s intended to do?

Many users of Blink Camera often face this face and scour the internet for some quick fixes. For your ease, we have identified potential reasons why the camera might have stopped working and what you can do to fix the issue.
This comprehensive guide will take you through all the troubleshooting fixes you can implement to correct the issue of your Blink Camera not detecting motion.
Why is The Blink Camera Not Detecting Motion?
Blink Camera not detecting motion could be a result of multiple reasons. Sometimes, the issues are trivial, and sometimes, they are beyond our control.
Following are a few potential reasons you need to pay close attention to:
1. Camera’s placement
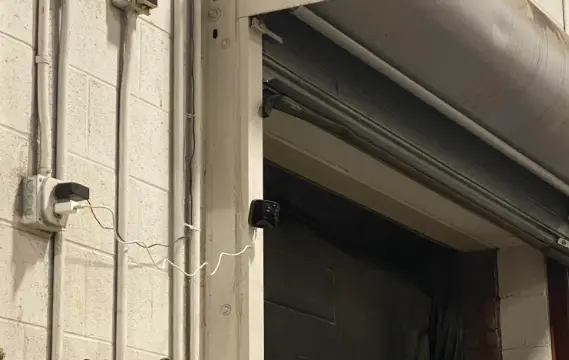
Believe it or not, the Blink camera’s placement significantly affects its range of motion. If you place it somewhere restricted or behind glass, it will end up causing errors because of the obstructions in front and around it.
2. Improper installation
If you haven’t installed your Blink camera properly, that’s another potential reason it might be facing issues with motion detection.
3. Low battery
Wireless Blink cameras need to be charged from time to time. If you haven’t charged the device in a long time, it could have low battery power, contributing to the errors and the lack of motion detection functionality.
4. Poor network connection
Blink cameras must be connected to a high-strength, stable network connection to work optimally. This means that if your Wi-Fi connection is weak or you are having network connectivity issues, that could affect the motion detection features, too.
Now that you have a list of potential causes checked out, let us walk you through the troubleshooting steps.
Also Read: Why You Need Thermal Imaging Cameras in Your Security Setup?
8 Ways to Fix Blink Camera Not Detecting Motion
Depending on the causes, we have narrowed down some of the effective fixes you can implement to troubleshoot the errors.
1. Fix the position of your camera
The first thing you need to do is cross-check the camera’s position and fix it if there are obstructions around it. If you weren’t aware, the Blink cameras use passive infrared sensors for motion detection.
If you place the camera in front of glass or other obstructions, the sensors won’t work as effortlessly. So, in the line of sight of this security camera, ensure there are no glass obstructions.
2. Arm the camera
For the Blink camera to detect motion, you must arm the camera. Now, what does that mean? Arming the camera allows the Blink camera to detect motion, record the movement, and update the same on the app.
If you are wondering how to arm the Blink camera, you need access to the app. Once you log into the app, you will find the “Arm/Disarm” functionality. Enable that feature.
3. Enable motion detection
Are you sure your Blink camera’s motion detection is enabled? This is another common mistake that most people do without knowing.
You can enable the motion detection feature via two methods:
The easier option is on the Blink app’s homepage. You will find a “running man” icon in the top-right corner of the screen. Tap on it. If it’s blue, it indicates that the motion detection is enabled.
The second option is changing the camera settings’ motion detection function. For this, tap on the three-line stacked menu to open Camera Settings. Find the “Enable Motion Detection” option and turn on the toggle.
Depending on your convenience, you can use any of these methods to enable the motion detection option in your Blink camera.
Also Read: Does Ring Offer 24/7 Continuous Recording? (How it Works)
4. Switch the activity zones
The Blink camera’s motion depends on the Activity Zones you have set in your camera settings. The feature is a curse or a boon. Let us explain.
When you select activity zones, the Blink camera won’t record unnecessary movement, like every time a car passes by the neighborhood or when the tree leaves are rustling.
However, having specific activity zones also means limiting your Blink camera’s range of motion and functions. Hence, you must switch the activity zones if your Blink camera isn’t working optimally.
5. Configure the camera sensitivity
Another tip to fix the issue is to configure the camera’s sensitivity. This is great if you notice that the Blink camera isn’t working as promptly as it should.
For this, you need to open your Blink camera and open the camera settings. Under that, find the Sensitivity slider. Increasing the sensitivity if you think your Blink camera isn’t picking up motion.
In general, the sensitivity is set to 5. If you think it’s insufficient, you can change the settings accordingly.
6. Change the night vision settings
Now that you know why the Blink camera might not be working optimally, let us focus on the night vision settings. It is a crucial aspect.
The security camera uses IR LEDs at night to detect and pinpoint movement around the home. If you want to up your security, especially during nighttime, you must change the night vision settings from the Blink app immediately.
If you want optimal and prompt detection and recording, set the night vision settings to Auto control and Medium IR Intensity.
7. Change the batteries
As we mentioned, low battery power is another potential reason your Blink camera isn’t working as it should. This is especially true if you use a wireless Blink camera on AA batteries.
Here’s what you need to do:
- Remove your Blink camera and dislodge the batteries after taking off the back compartment.
- Blink cameras need two AA batteries. Change them accordingly.
- Once done, put the back compartment in place, and you are all set.
We recommend changing the batteries every few weeks or months, depending on the usability.
8. Cross-check the network
Blink cameras require access to the internet for it to function promptly. This means that if your Blink camera isn’t connected to a stable Wi-Fi connection, it won’t perform well, especially regarding motion detection.
If the camera isn’t connected to the internet, it will fail to record the motion and detect it.
Rebooting the router can help reset the network settings. Here’s what you need to do:
- Unplug your router and your modem from the power sources.
- Wait for 30-60 seconds.
- Plug the device back into the power outlets.
Let the set-up process complete, and then you can reconnect your Blink camera to the Wi-Fi network and check if it’s working optimally.
How to Reset Blink Camera?
Now that you have access to a list of standard troubleshooting fixes, what happens if the issue is with the Blink camera? What do you do then?
In such cases, you’d need to reset the device. Depending on the model of the Blink camera you are using, the reset process or steps will be different.
1. Blink Mini
The reset button is right on the camera. Since you need to long-press the button, find a non-sharp but pointed item that will fit in the hole of the reset button.
Long-press the reset button for 5-10 seconds until the green or blue lights appear. If you find the red light not changing to blue or green, you’d need to contact a professional.
2. Blink Outdoor, Indoor, XT, or XT2
The reset button in these models is present underneath the back cover. So, you will need to remove the back cover first. If you look closely, the reset button is beside the battery compartment.
Like the previous method, find a narrow item to access the reset button and long-press on it for longer than 5 seconds until the color of the light changes from red to blue/green.
Conclusion
Motion detection is one of the most essential features of the Blink camera. So, if you find that the function isn’t working as seamlessly as it should, it indicates that you need to take proactive steps to fix the error accordingly. We hope the troubleshooting tips mentioned in this article are enough to help you navigate through the issue accordingly.