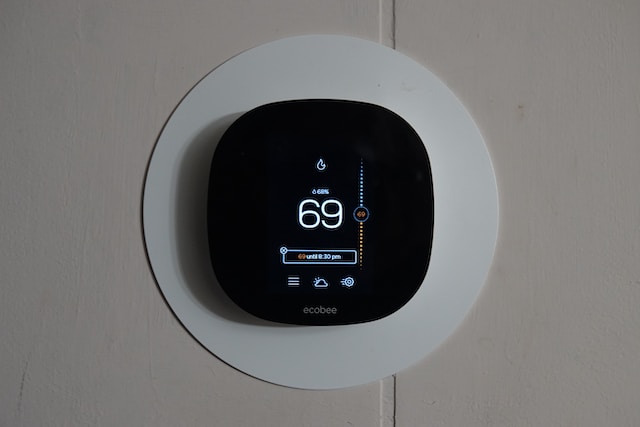
The Nest Thermostat is one of Google Nest’s new innovations. It is a smart thermostat that is programmable, self-learning, and Wi-Fi-enabled. It optimizes heating and cooling to conserve energy. The user will have to provide the data for the first few days, after which the thermostat will program itself as per the given algorithm.
HomeKit, on the other hand, is Apple’s smart home platform that lets you control all devices ranging from thermostats to light bulbs, from the comfort of your Apple device. These smart products can be controlled through the Internet. That’s how easy it is!
In this article, we will discuss how to connect your Nest Thermostat to your HomeKit, what items you need to keep ready, how to use Nest Thermostat and any troubleshooting issues you may encounter.
Let’s get started.
Prerequisites
Before you start setting up both devices, you’re going to need a few equipments.
Nest Thermostat
Google’s Nest Thermostat is a very efficient, user-friendly device that controls your heating and cooling needs while conserving energy. It is a useful tool to have around if you’re tired of manually controlling your home/office temperature every now and then. The device will do it for you as per your needs according to the data you input in the first few days of use.
HomeKit
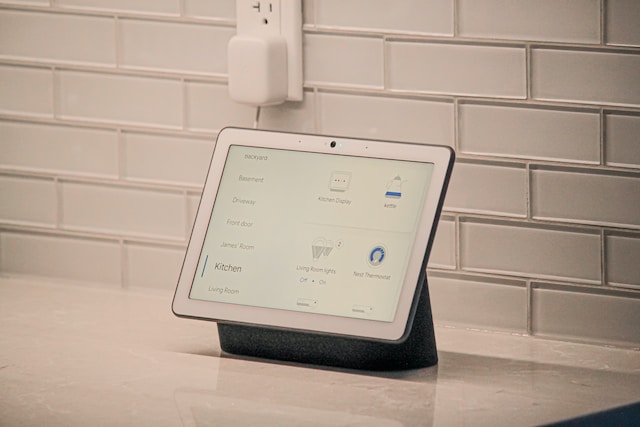
HomeKit or Apple Home is another such device that upgrades your life. It lets you control your thermostat, light bulbs, window blinds, plugs, etc., from the comfort of your Apple device. Connecting HomeKit to your Nest Thermostat means you will not have to worry about the latter at all. Any changes you want to make to your temperature or thermostat settings can be taken care of from your phone or other devices.
A Mac (Always On) Or HomeBridge hub
Since HomeKit and Nest Thermostat aren’t naturally compatible, you will need a bridge that can connect the two. If you choose to use a Mac, you can download the HomeBridge app and connect the two devices through this interface. But, the downside of using a Mac is that it will need to be on all the time. This scenario is unrealistic, especially if you want to carry your Mac to work or school.
Owning a HomeBridge hub, on the other hand, allows you to connect the HomeKit and Nest Thermostat and then just forget about it. The hub acts as an interface between the two, and there are no downsides to investing in this, as it is not like connecting through your Mac.
Stable Wi-Fi Connection
Another important factor to consider while connecting the two smart devices is a stable Wi-Fi connection. This ensures that your Nest Thermostat and HomeKit are securely connected, and there are no lags between them.
Set Up The Nest Thermostat
Before we get into connecting your Nest Thermostat with your HomeKit, let’s see how to set up the thermostat.
The first thing you need to do after unboxing your Nest Thermostat is to sign up for a new account or log in to your existing account. If you’re creating a new account, here are the steps to follow:
- Connect your device to your Wi-Fi.
- Choose your email address.
- Create a strong password and confirm.
- Enter your home address where you would like to set up the device.
- Select your city from the drop-down list.
- Enter your phone number so Nest can send you alerts.
- Choose whether or not you want this device to show up on your energy bill.
- Sign in with your Google account if desired.
- Agree to the terms of service by selecting I Agree.
It is important to ensure your device is connected to a strong and stable Wi-Fi connection because this will affect its performance and connectivity with HomeKit. To ensure there aren’t any issues, make sure your Wi-Fi is secure first.
When setting up your account, you will be asked what kind of heating and cooling system you have, so the device can be configured accurately. After verifying this, the installation instructions will be easy to follow.
Connect Nest Thermostat With HomeKit
Now, let’s see how we can easily connect your Nest Thermostat with HomeKit. Before we do this, however, adding your iCloud Security Code is important. Open Settings > Go to iCloud > Set up iCloud Keychain > Enter Security Code when prompted > Click Continue. Set up your iCloud Keychain on all the devices that will be on HomeKit so they’re all backed up. This will save a lot of time.
Here’s how to connect Nest Thermostat with HomeKit:
- Download the Nest app on your Apple device.
- Open the Nest app and log in using your Nest account.
- Tap on Settings on the top right corner of the screen.
- Scroll down and tap on Works with Nest.
- Toggle on the HomeKit switch to enable it.
- Follow the instructions shown on the screen to complete the process.
- Download the Nest app on your iPhone or iPad and log in to your Nest account.
- Now, you can control the Nest Thermostat using your Apple device.
Note: It is important to ensure that your device is running on the latest version of iOS or macOS. Otherwise, you may run into compatibility issues.
Using Nest Thermostat With HomeKit
Now that we’ve successfully connected the two smart devices, let’s see how we can use them.
Setting up automation and controlling the Nest Thermostat through Siri are some of the most common ways people use HomeKit.
- Make sure you have the latest version of the Nest app installed.
- Ensure your iPhone or iPad is labelled as a “trusted device”. Here’s how to do that: Open Settings on your iPhone or iPad > Select Face ID & Passcode or Touch ID & Passcode > Scroll down and tap on Trusted Devices > Click on Add a Device > Enter your Nest account password if prompted > Open the Nest app from the same device > Click Allow when prompted.
- Next, tap on Automation.
- Scroll down and tap on Scenes.
- Select Create New Scene.
- Select Custom and change the name to whichever you’d like. Let’s go with Evening for the sake of this instruction manual.
- Click on Edit Details and select Turn on All Devices.
- Tap Set Value and increase the Temperature and lower the Brightness.
- Set your Auto-Away Time.
- Save all settings.
- Press Continue.
- Scroll down and tap Apps.
You can use Siri to control your temperature and scenes. Here are some examples of commands you can use on Siri to control your Nest Thermostat:
- Set your home’s temperature by saying, “Hey Siri, set the thermostat to 60 degrees.”
- Switch between the ON and AUTO modes on the indoor blower fan of your HVAC system by asking Siri.
- Turn on eco mode using Siri.
- Choose the mode of your thermostat by saying, “Hey Siri, set the thermostat to cool.”
- Control the humidity of the room by asking Siri to change the percentage.
- Ask Siri what the temperature of a specific room is.
- Control your hot water settings by asking Siri.
- Set up cool automations related to the thermostat.
- By setting up scenes, you can choose a particular one for what you’re feeling and ask Siri to turn it on.
Troubleshooting
Sometimes, your Nest Thermostat may face some issues like frozen or slow display and Internet connectivity issues. This can be fixed with an easy restart or reset of the device. Another problem that can be resolved by resetting your Nest Thermostat is if you need to clear out some or all of your home, personal, or schedule settings.
Restart Your Nest Thermostat
- Press your thermostat ring to open the Quick View menu.
- Select Settings.
- Turn the ring to Reset and press to select the option.
- Choose the Restart option.
Here’s how to manually restart your thermostat if you have a frozen screen:
- Press your thermostat ring and hold it down for for ten seconds, until the screen turns off. This will take about 10 seconds.
- Press and release the ring to turn it back on. The Nest logo will appear as startup begins.
Note: Restarting your Nest Thermostat will not delete any of your data. Much like a computer or smartphone, your device will reboot, and any display or Internet connectivity issues will be resolved.
Reset Your Nest Thermostat
- Press your thermostat ring to open the Quick View menu.
- Select Settings.
- Turn the ring to Reset and press to select the option.
- Choose one of the below options:
Schedule
This option clears out your entire temperature schedule. Any set points that your device has learned, or that you’ve created, will be deleted.
After resetting, you can create a brand new schedule or wait for your device to learn your new schedule.
Away
Your thermostat records information about how often you walk by to help your connected devices automatically switch as you come and go. If you choose this option, these settings will be erased.
If you’re moving to a new locality or house, it is best to use this reset option so the device can learn about its location in a few days.
Network
This option resets all the network information on your thermostat. It will no longer be connected to the internet or have your Wi-Fi password stored.
To reconnect your thermostat to the internet, go to Settings > Network menu.
All Settings
If you choose this option, all the data your device has collected will be erased, and it will go back to its default settings.
Note: Before resetting your thermostat, you might want to write down the settings so you can easily restore them if needed. On your thermostat, go to Settings > Equipment and record your system wires, heating type and Safety Temperature settings.
Conclusion
Owning a Nest Thermostat makes your life easier as it learns your schedules and preferences and adjusts accordingly. By connecting it to HomeKit, you can make its usage even easier by asking Siri to change or alter any temperature or scene settings.
Since Nest Thermostat is a Google product and HomeKit is Apple’s they are not naturally compatible. However, you can bridge this gap with HomeBridge.
Any troubleshooting issues can be solved by resetting or restarting your Nest Thermostat, which is an easy process.
I hope this outline helps! Let me know if you have any other questions or if there’s anything else I can assist you with.
Also read: Neighborhood Watch 2.0? Google’s New Patent & Home Security