Did you get a notification saying your iPhone storage is full? If so, this article is for you.
That message is actually a big issue, and it’s not something you should ignore. At best, it means you won’t be able to take new photos, download apps, or save files. At worst, your iPhone could slow down, freeze, or even shut off and refuse to turn back on.
If you want to avoid all that, the quickest fix is to start deleting files from different categories. But how do you know what’s best to delete without wasting time or losing something important? This article will walk you through it step by step.
How to Free Your iPhone Storage Quickly
When your iPhone tells you the storage is full, it’s not just about being unable to save new data. It also means iOS can’t manage cache or system files properly anymore, which clearly signals the need for swift action. Below, we’ve laid out what we think is the best order of steps to add more free storage on your iPhone and get it under control. Just read through and follow each step on your iPhone precisely as listed to avoid making the situation worse.
Step 1: Follow iOS Recommendations to Optimize Storage
When your storage starts getting full, iOS may occasionally show recommendations in the storage settings. These tips usually apply to different types of data, and once you follow them, you’ll free up enough space to keep your iPhone running smoothly and allow the system to handle basic tasks.
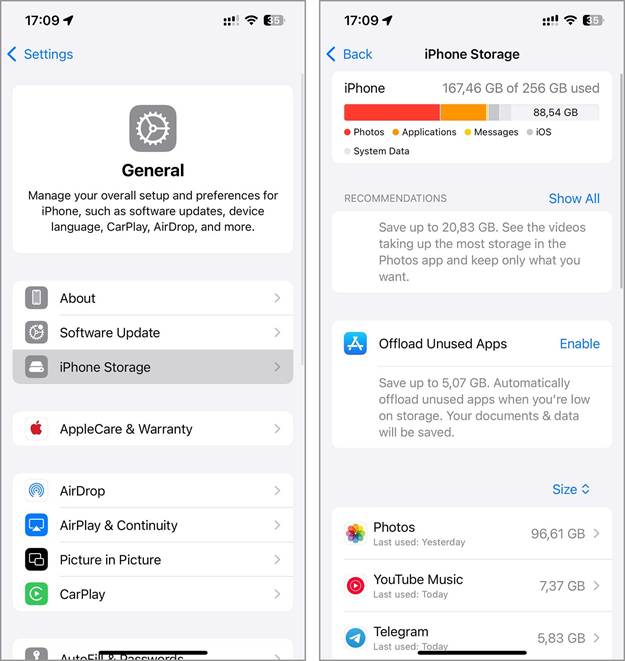
To find and implement these recommendations, follow these steps:
- Open the Settings app on your iPhone.
- Tap on General.
- Select iPhone Storage. Here, iOS displays a list of recommendations tailored to your usage patterns.
- Review the recommendations provided and follow them.
These recommendations work a little differently depending on what they are. Some just require a quick tap on “Enable,” and iOS takes care of the rest for you. Others will send you to a different section where you’ll need to go through and manually delete files, like when you’re clearing out large attachments or app data. In those cases, you’ll have to review everything and decide what to keep and what to get rid of.
These suggestions depend on how you use your iPhone, but here are a few common ones you’ll probably see:
- Offload Unused Apps – If you haven’t opened certain apps in a while, iOS may recommend offloading them. It removes the app itself but keeps your data, so you can reinstall it later without losing anything.
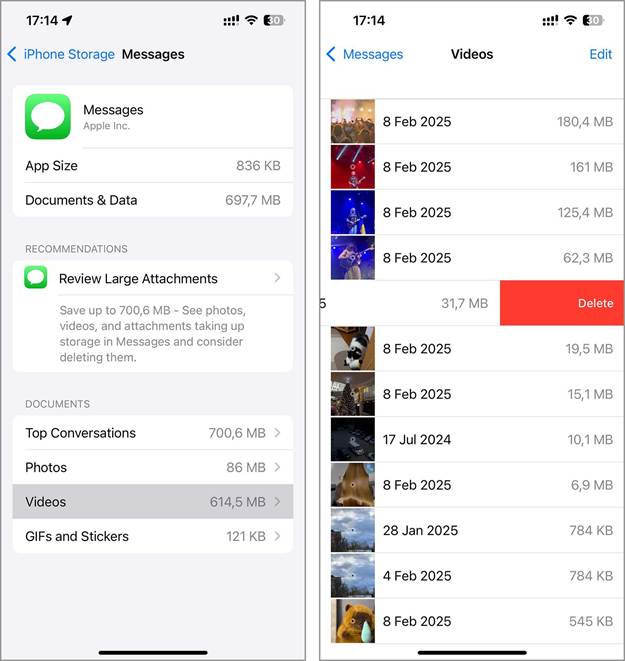
- Review Large Attachments – If messages are taking up a lot of space with media files, this lets you go in and delete the biggest ones directly.
- Recently Deleted Album – If you’ve deleted pictures or videos but haven’t cleared the Recently Deleted album, iOS will remind you that they’re still using space.
- Review Personal Videos – Since videos are huge storage hogs, iOS might suggest going through and clearing out the ones you don’t need anymore.
Step 2: Manage Photos App Content
Once you follow iOS’s recommendations, your iPhone should have enough breathing room to handle basic tasks again, but don’t stop there. The Photos app usually takes up a big chunk of your storage, sometimes even the most.
Sure, you could go through each album manually and delete photos and videos you don’t need anymore, but there’s a faster way. Use a cleaner app made for the iPhone to speed things up. One we recommend is Clever Cleaner: AI CleanUp App. It’s a relatively new app but already has great reviews on the App Store and other platforms. The best part? It’s completely free, with no paywalls or hidden payments, and its features can easily hold their own against paid alternatives.
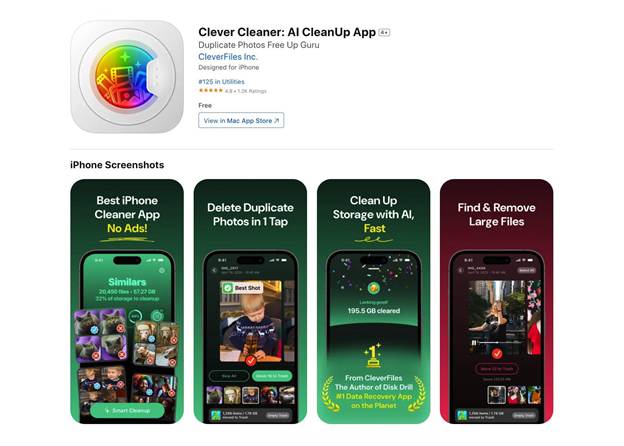
Clever Cleaner comes with four key features that make it easy to clean up your photo and video library without losing anything important:
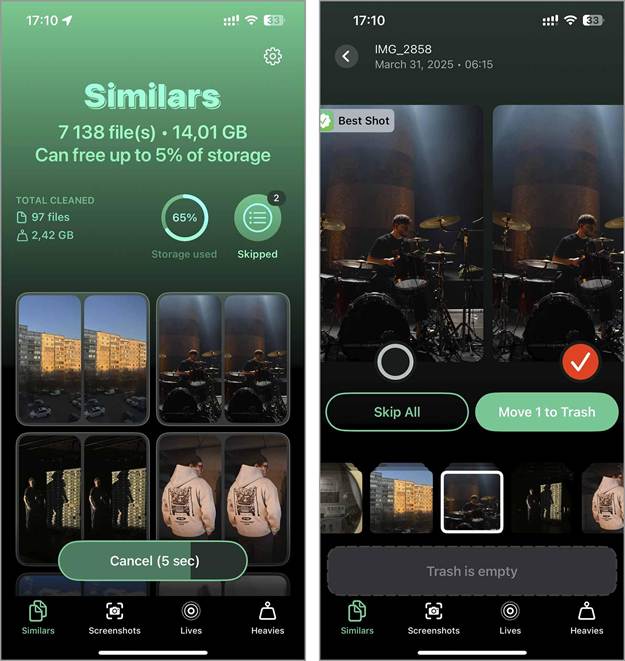
- Similars finds both exact duplicates and similar-looking images, groups them, and uses AI to pick the best shot in each group. It marks the rest for deletion, so you can clear them with one tap or go in and manually choose which ones to keep or remove.
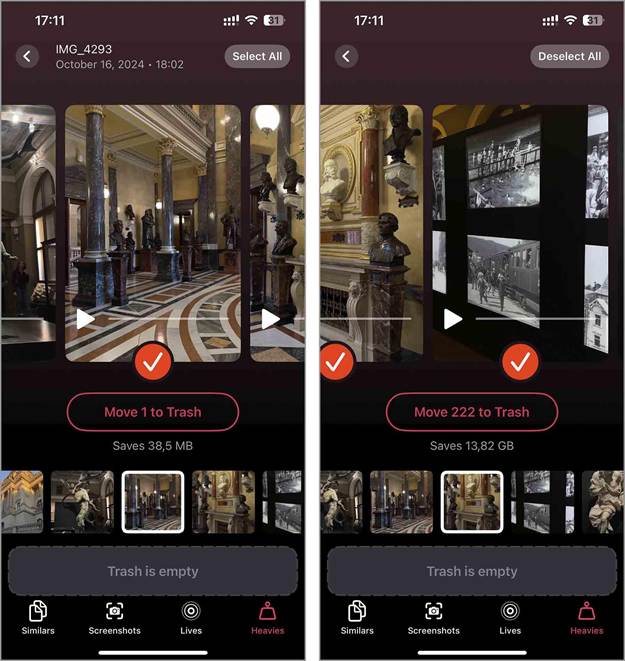
- Heavies sorts through your largest photos and videos, showing them by size or date. You can easily delete the biggest files that are eating up your storage. It’s super useful since iOS doesn’t offer a built-in way to sort by file size.
- Lives lets you convert Live Photos to still images, removing the motion and sound, to shrink their file size before deleting the original.
- Screenshots mirrors your screenshot album and lets you delete all of them at once or just the ones you no longer need. Simple and effective.
Here’s how you can use this app:
- Open the App Store, search for Clever Cleaner, and tap Get to install it.
- Once installed, open the app. It’ll ask for access to your Photos – go ahead and allow it so it can scan your media library.
- After the scan, choose which feature you want to use: Similars, Heavies, Lives, or Screenshots.
- For Similars and Screenshots, you’ll see a big button that lets you delete everything in one tap. Or, if you prefer, you can manually go through and pick what to keep and what to toss.
- In the Lives and Heavies, scroll through the files and either select the ones you want to delete or hit Select All to grab everything. Then tap Move to Trash to confirm.
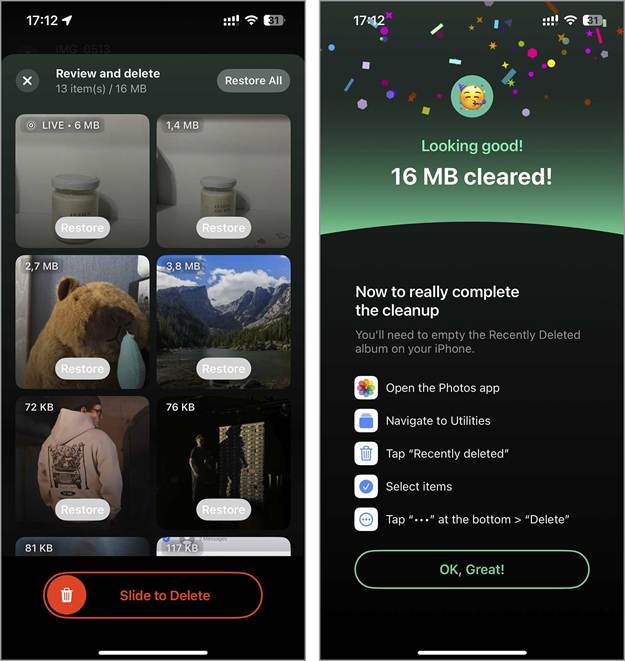
- A pop-up will let you know the files have been moved to the app’s trash. If you want to double-check, tap the message to review your choices and drag the Slide to Delete. But if you’re confident and want to skip the extra step, just tap Empty Trash to clear it all out.
- The app will let you know the files are now sitting in your iPhone’s Recently Deleted album. Just follow the on-screen steps to clear that out, too, and free up your iPhone storage.
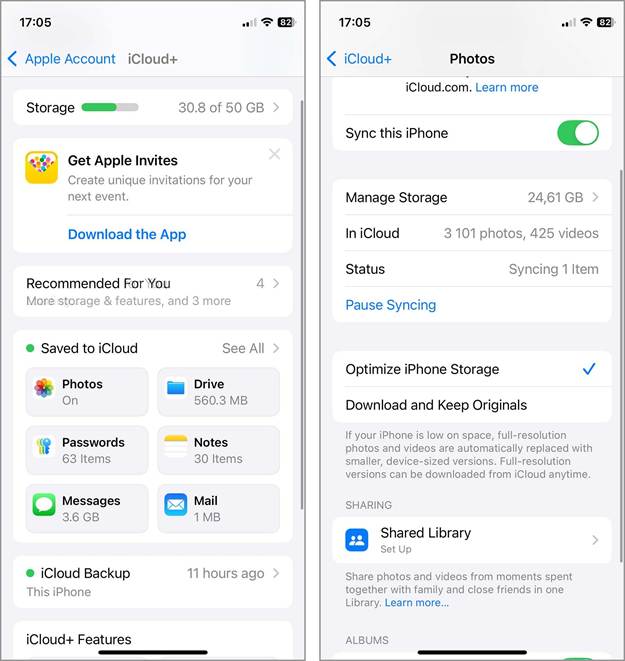
If you’d rather not delete any of your photos or videos, you can turn on the Optimize iPhone Storage feature instead. It moves your full-resolution media to iCloud and keeps smaller, space-saving versions on your device. To turn it on, go to Settings > [your name] > iCloud > Photos, then select Optimize iPhone Storage. However, iCloud only gives you 5 GB of free space. If your photo and video library is bigger than that, you’ll need to check out iCloud+ plans and pick one that fits your storage needs.
Step 3: Delete or Offload Unnecessary Apps
Apps, like photos and videos, can take up a big chunk of your iPhone’s storage, so managing them is a smart way to free up a ton of space. Go through everything you’ve got installed and delete the apps you no longer use, either partially (by offloading) or completely. You might be surprised how many gigabytes you can recover.
Follow these steps:
- Open Settings on your iPhone.
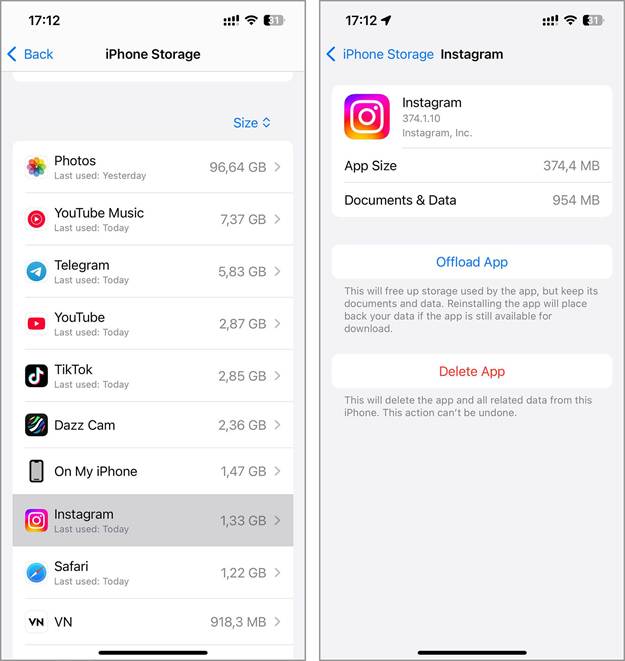
- Navigate to General > iPhone Storage. This area displays a list of all your apps along with the amount of storage each one uses.
- Tap on an app you want to remove or offload. You will see two options: Delete App and Offload App (Delete App gets rid of the app and all its data from your iPhone. It’s the best option if you don’t use the app anymore and don’t plan to reinstall it. Offload App removes the app itself but keeps its documents and data. If you reinstall the app later, everything returns like it never left. This is a great option for apps you don’t use often but might need again).
Step 4: Clear Other Categories of Data
The steps above should be enough to get rid of the “iPhone storage full” message and have your phone working normally again. But if you want to clear even more space, you can try cleaning out other types of data, too.
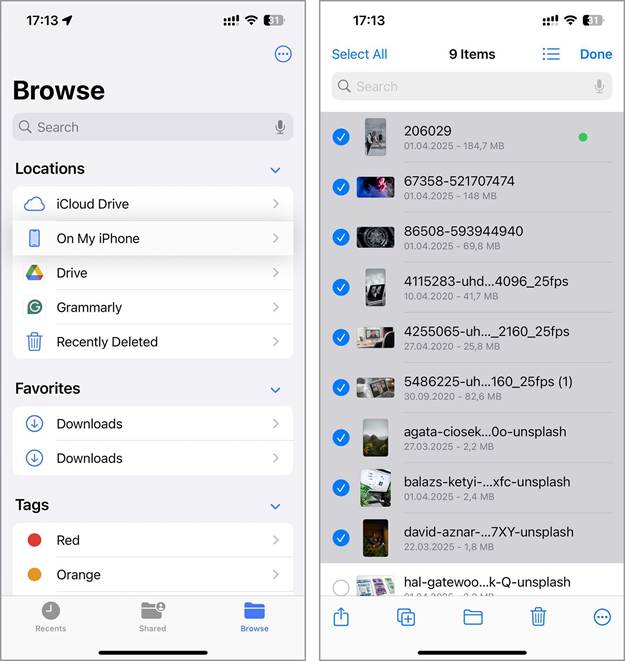
- Files app: This is where your iPhone stores files downloaded from the web or other apps that don’t send items to the Photos app. To clear some space, open the Files app, find the files or folders you don’t need anymore, select them, and tap the trash can icon to delete.
- Browser cache: Your browser saves cache and website data over time to help things load faster by avoiding repeated downloads. But all that stored data can start to pile up. To clear it, head to Settings > Safari (or Settings > Apps > Safari, depending on your iOS version), then tap Clear History and Website Data.
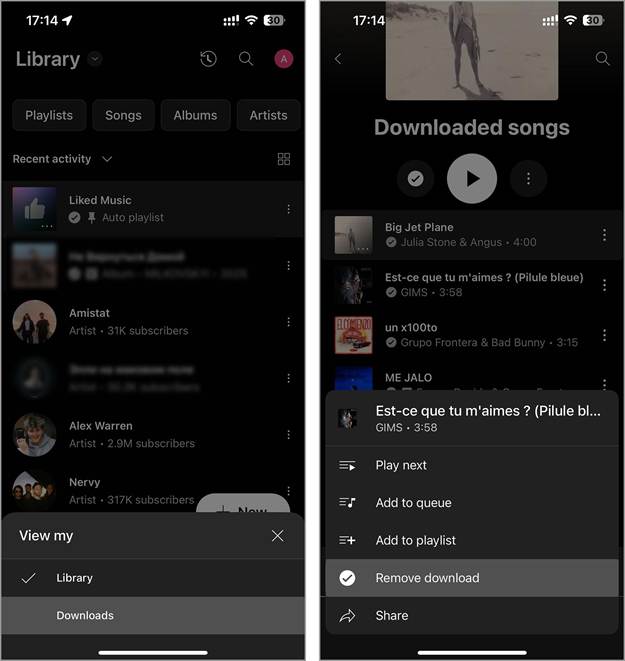
- Saved content for offline access: Apps like Spotify, Apple Music, YouTube Music, Podcasts, and Books let you save files to use when you’re offline. Even though the main files live on their servers, the offline versions can still take up a lot of space if you download content often. To manage this in YouTube Music, for example, open the app, go to Library > Downloads, tap the three dots next to the item you want to remove, and choose Remove download.
- Messages and their attachments: If you use messaging apps a lot and share things like photos, videos, or other files, those attachments can eat up a good chunk of your storage. To clear them out, go to Settings > General > iPhone Storage > scroll down and select Messages from the list of apps. Here, tap on the specific category > find the files you want to delete > swipe left and tap Delete.
Conclusion
When your iPhone says the storage is full, don’t ignore it. Take action right away. The good news is that you don’t have to delete everything to save a few megabytes. Following the simple, organized steps we provide in this article, you can clear up space quickly without losing anything important.
Just keep in mind – if you don’t keep track of the data piling up on your iPhone, it’ll fill up again before you know it. And next time, you might not get a warning before your iPhone slows down or stops working altogether. So, take charge of your storage and control your device.